
Aperture‚ Shutter Speed‚ and ISO: A Comprehensive Guide & Chart

Understanding the exposure triangle—aperture‚ shutter speed‚ and ISO—is crucial for photographers․ Free PDF resources and charts aid learning these settings‚ blending Aperture/Shutter Priority and Manual modes․
Understanding the Exposure Triangle
The exposure triangle‚ a foundational concept in photography‚ elegantly illustrates the relationship between aperture‚ shutter speed‚ and ISO․ These three elements work in harmony to determine the brightness‚ or exposure‚ of your photographs․ Mastering this interplay is key to moving beyond automatic settings and achieving creative control․
Aperture controls the size of the lens opening‚ influencing both the amount of light reaching the sensor and the depth of field․ Shutter speed dictates how long the sensor is exposed to light‚ impacting motion blur․ Finally‚ ISO measures the sensor’s sensitivity to light; higher ISO values are useful in low-light situations but can introduce image noise․
Understanding how adjustments to one setting affect the others is vital․ For instance‚ increasing aperture (a lower f-number) lets in more light‚ potentially allowing for a faster shutter speed or lower ISO․ Numerous PDF charts and guides are available online to visually represent these connections‚ aiding photographers in quickly referencing optimal settings for various scenarios․ These resources often demonstrate how to balance these settings in Aperture/Shutter Priority and Manual modes․
What is Aperture?
Aperture refers to the opening within a camera lens through which light passes to reach the sensor․ It’s measured in f-stops – numbers like f/2․8‚ f/5․6‚ and f/16․ A lower f-stop (e․g․‚ f/2․8) indicates a wider opening‚ allowing more light in‚ while a higher f-stop (e․g․‚ f/16) signifies a narrower opening‚ letting in less light․
Beyond light control‚ aperture profoundly impacts depth of field – the area of your image that appears sharp․ A wide aperture (low f-stop) creates a shallow depth of field‚ ideal for isolating subjects with a blurred background‚ often desired in portraiture․ Conversely‚ a narrow aperture (high f-stop) yields a large depth of field‚ keeping more of the scene in focus‚ perfect for landscapes․
Many online resources‚ including downloadable PDF charts‚ visually demonstrate the relationship between f-stops and depth of field․ These charts are invaluable for understanding how to manipulate aperture in Aperture Priority or Manual modes to achieve specific creative effects․ Mastering aperture is a cornerstone of photographic control‚ allowing you to shape the look and feel of your images․
Aperture and Depth of Field
The relationship between aperture and depth of field is fundamental to photographic control․ Depth of field (DoF) defines how much of your image appears acceptably sharp‚ from foreground to background․ A wider aperture (smaller f-number like f/2․8) results in a shallow DoF‚ blurring the background and isolating your subject – excellent for portraits․
Conversely‚ a narrower aperture (larger f-number like f/16) creates a large DoF‚ keeping more of the scene in focus‚ ideal for landscapes where sharpness throughout the image is desired․ Understanding this interplay allows photographers to intentionally control what’s in focus and what isn’t‚ guiding the viewer’s eye․
Numerous PDF guides and exposure charts illustrate this concept visually‚ demonstrating how different f-stops affect DoF at various focal lengths․ These resources are particularly helpful when shooting in Aperture Priority or Manual mode‚ enabling precise control over the image’s aesthetic․ Experimenting with aperture and observing the resulting DoF is key to mastering this essential photographic technique․
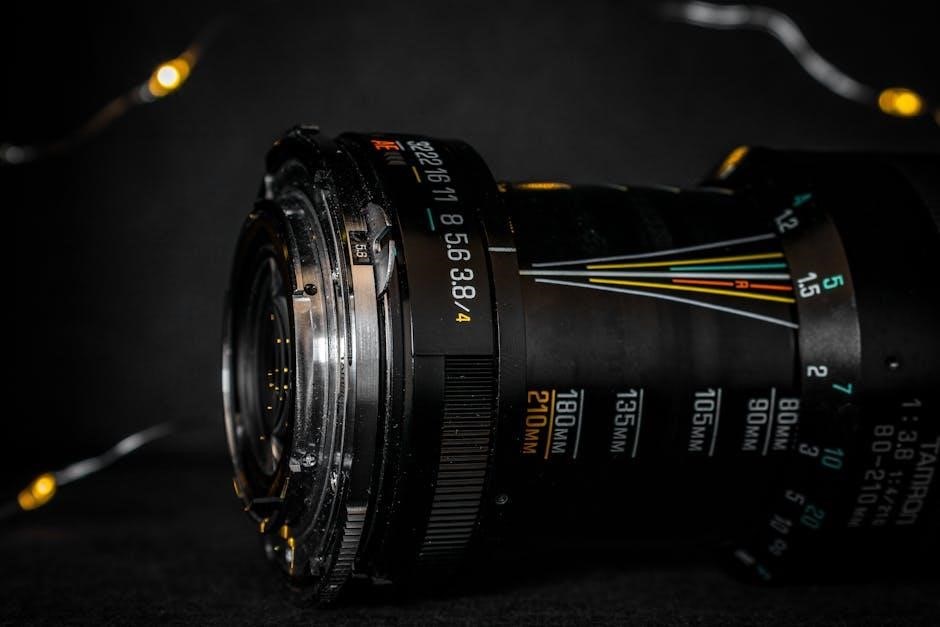
Common Aperture Values (f-stops)
Standard aperture values‚ known as f-stops‚ follow a logarithmic scale‚ each step representing a doubling or halving of light․ Common values include f/1․4‚ f/2‚ f/2․8‚ f/4‚ f/5․6‚ f/8‚ f/11‚ f/16‚ and f/22․ Lower f-numbers (e․g․‚ f/1․4‚ f/2) are ‘wide’ apertures‚ letting in more light and creating shallow depth of field‚ often used for portraits․
Higher f-numbers (e․g․‚ f/16‚ f/22) are ‘narrow’ apertures‚ letting in less light but increasing depth of field‚ suitable for landscapes․ f/8 is often considered a ‘sweet spot’ offering a good balance between sharpness and light gathering․ Many PDF exposure charts visually represent these values and their effects․
Photographers utilizing Aperture Priority or Manual modes frequently reference these values․ Understanding how each f-stop impacts both exposure and depth of field is crucial․ Resources detailing these values‚ often found in downloadable guides‚ help photographers quickly select the appropriate setting for their creative vision and shooting conditions․
What is Shutter Speed?
Shutter speed represents the duration the camera’s sensor is exposed to light․ Measured in seconds or fractions of a second (e․g․‚ 1/1000s‚ 1/60s‚ 1s‚ 10s)‚ it directly impacts how motion is captured in an image․ Faster shutter speeds (e․g․‚ 1/1000s) freeze motion‚ ideal for sports or wildlife photography․ Slower shutter speeds (e․g․‚ 1/30s‚ 1s) blur motion‚ creating a sense of movement or light trails․
The interplay between shutter speed‚ aperture‚ and ISO forms the exposure triangle․ A slower shutter speed requires a wider aperture or higher ISO to maintain proper exposure․ Many PDF guides and exposure charts illustrate these relationships․ Understanding shutter speed is vital when using Shutter Priority or Manual modes․
Photographers often adjust shutter speed to creatively control the look of their images․ Resources detailing common shutter speed values for various scenarios are readily available‚ often in downloadable chart formats‚ aiding in quick setting selection․
Shutter Speed and Motion
Shutter speed’s primary role concerning motion is to either freeze it or blur it․ Fast shutter speeds—like 1/500s or faster—effectively “stop” action‚ capturing sharp images of moving subjects․ Conversely‚ slower shutter speeds—such as 1/30s or longer—create motion blur‚ conveying a sense of speed or dynamism․ This is frequently used in landscape photography to smooth water or create light trails․
The choice depends on the desired effect and the subject’s speed․ A moving car requires a faster shutter speed than a slowly drifting cloud․ Exposure charts‚ often available as PDF downloads‚ provide guidelines for different scenarios․ Mastering this relationship is key to utilizing Shutter Priority or Manual modes effectively․
Experimentation is crucial․ Panning—moving the camera with a moving subject—requires a slower shutter speed to blur the background while keeping the subject relatively sharp․ Understanding these nuances unlocks creative control‚ and readily available resources can help guide your learning․
Common Shutter Speed Values
Typical shutter speed values are presented in a sequence‚ each doubling or halving the exposure time․ Common values include 1/1000s‚ 1/500s‚ 1/250s‚ 1/125s‚ 1/60s‚ 1/30s‚ 1/15s‚ 1/8s‚ 1/4s‚ 1/2s‚ 1s‚ and beyond․ These speeds cater to diverse photographic needs‚ from freezing fast action to creating intentional motion blur․
For sports or wildlife photography‚ 1/500s or faster is often necessary to eliminate motion blur․ Landscapes typically utilize slower speeds‚ like 1/60s or slower‚ often with a tripod for stability․ Many PDF exposure charts illustrate these recommended ranges‚ correlating shutter speed with subject movement and desired effect․
Remember that these are guidelines; creative choices often deviate․ Understanding how shutter speed interacts with aperture and ISO—the exposure triangle—is paramount․ Experimenting with different values‚ particularly in Aperture or Shutter Priority modes‚ will solidify your understanding and refine your photographic vision․
What is ISO?
ISO measures your camera sensor’s sensitivity to light․ A lower ISO‚ like 100 or 200‚ means the sensor is less sensitive‚ requiring more light for a proper exposure and resulting in cleaner images․ Higher ISO settings‚ such as 800‚ 1600‚ or 3200‚ increase sensitivity‚ allowing you to shoot in darker conditions․
However‚ increasing ISO comes at a cost: image noise‚ or grain․ While modern cameras handle higher ISOs better‚ excessive noise can degrade image quality․ Many PDF guides dedicated to the exposure triangle visually demonstrate the trade-off between ISO and noise․
Essentially‚ ISO amplifies the signal from the sensor․ Think of it as turning up the volume on a quiet sound – it makes the sound louder‚ but also introduces static․ Mastering ISO involves finding the sweet spot where you gain enough light sensitivity without sacrificing too much image quality․ Understanding this is fundamental to exposure control․
ISO and Image Noise
Image noise‚ often appearing as graininess‚ is a direct consequence of increasing the ISO setting․ As the camera boosts the signal from the sensor to enhance sensitivity in low light‚ it also amplifies random variations – this manifests as noise․ The higher the ISO‚ the more pronounced the noise becomes‚ impacting image detail and clarity․
Different camera sensors handle noise differently․ Full-frame sensors generally perform better at high ISOs than crop sensors‚ producing cleaner images with less noise․ Many PDF exposure charts illustrate this relationship‚ showcasing noise levels at various ISO settings for specific camera models․
Noise reduction software can mitigate noise‚ but it often softens images and reduces sharpness․ Therefore‚ it’s preferable to keep the ISO as low as possible while still achieving a properly exposed photograph․ Understanding the noise characteristics of your camera is crucial for making informed decisions about ISO selection․
Common ISO Values
Standard ISO values follow a doubling progression‚ each step representing a significant increase in sensitivity․ ISO 100 is typically the base ISO for many cameras‚ offering the cleanest image quality with minimal noise․ ISO 200 is often used in bright daylight conditions‚ providing a slight boost when needed․
For indoor photography or overcast days‚ ISO 400 and 800 are frequently employed․ These settings balance sensitivity and noise reasonably well․ As light diminishes further‚ ISO 1600‚ 3200‚ and 6400 become necessary‚ but noise becomes increasingly noticeable․ Many PDF exposure charts detail the expected noise levels at these higher values․
Modern cameras often extend to ISO 12800‚ 25600‚ and beyond‚ but image quality degrades significantly․ Selecting the appropriate ISO involves a trade-off between brightness and noise․ Understanding these common values‚ often visualized in exposure charts‚ helps photographers make informed decisions based on the shooting environment․
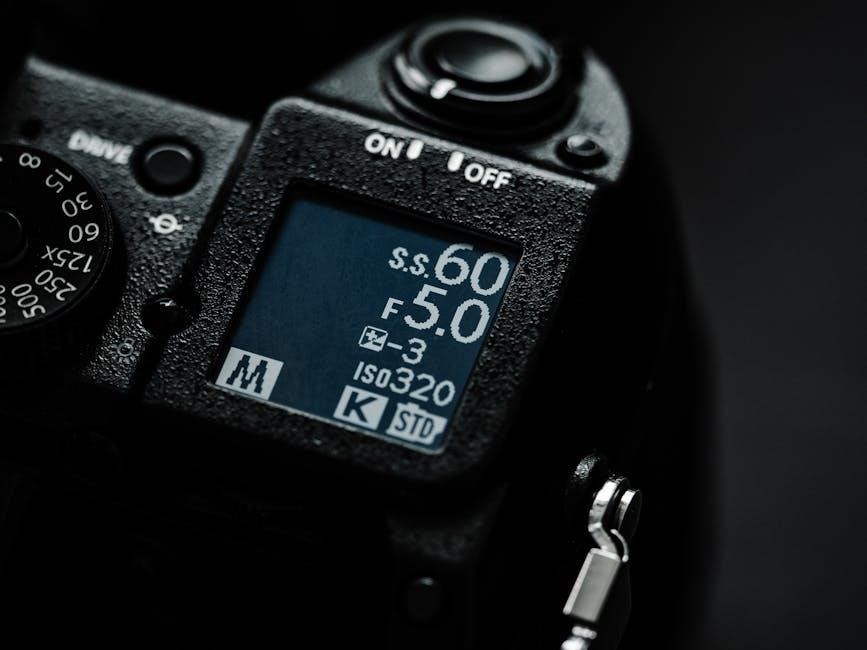
The Relationship Between Aperture‚ Shutter Speed‚ and ISO
These three elements – aperture‚ shutter speed‚ and ISO – form the exposure triangle‚ intrinsically linked in determining an image’s brightness․ Adjusting one necessitates compensating for changes in the others to maintain proper exposure․ A PDF exposure chart visually demonstrates this interplay․
For instance‚ a wider aperture (lower f-number) lets in more light‚ allowing for a faster shutter speed or lower ISO․ Conversely‚ a narrower aperture (higher f-number) requires a slower shutter speed or higher ISO to achieve the same brightness․ Increasing ISO amplifies the signal‚ enabling faster shutter speeds in low light‚ but introduces noise․
Mastering this relationship is fundamental to photographic control․ Exposure charts provide a quick reference for understanding how these settings interact‚ aiding photographers in achieving desired creative effects and technically sound images․ Balancing these elements is key to optimal results․
Exposure Compensation
Exposure compensation overrides the camera’s automatic metering system‚ allowing photographers to fine-tune brightness․ It’s particularly useful in challenging lighting situations where the camera might be fooled‚ like scenes with predominantly bright or dark tones․ A PDF exposure chart can illustrate optimal compensation values․
Typically measured in stops (+/-)‚ exposure compensation instructs the camera to brighten or darken the image․ Positive values (+1‚ +2) increase brightness‚ while negative values (-1‚ -2) decrease it․ Understanding how aperture‚ shutter speed‚ and ISO influence exposure is crucial when using this feature․
For example‚ shooting snow scenes often requires positive compensation to prevent underexposure․ Conversely‚ dark subjects may need negative compensation․ Mastering exposure compensation‚ alongside a solid grasp of the exposure triangle‚ empowers photographers to consistently achieve well-exposed images‚ regardless of the scene’s complexity․
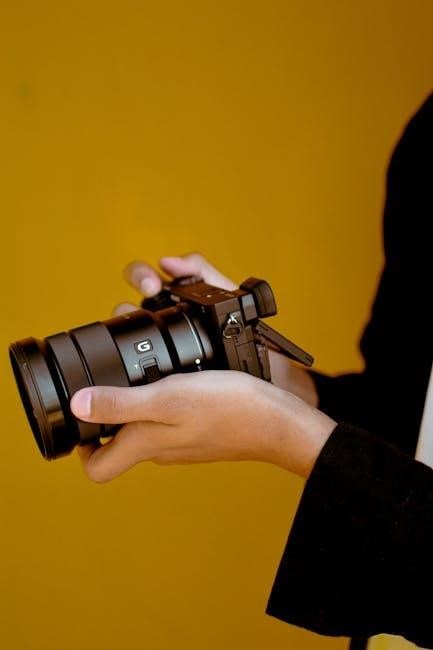
Shooting Modes: Auto‚ Aperture Priority‚ Shutter Priority‚ Manual

Cameras offer various shooting modes‚ each granting different levels of control over aperture‚ shutter speed‚ and ISO․ Auto mode handles everything‚ simplifying shooting but limiting creative input․ Aperture Priority (Av or A) lets you set the aperture‚ while the camera determines shutter speed․ Shutter Priority (Tv or S) reverses this‚ allowing shutter speed control with automatic aperture adjustment․
Manual (M) mode provides complete control over all three settings‚ demanding a thorough understanding of the exposure triangle․ PDF guides often detail how these modes interact and when to use each one․ New photographers benefit from utilizing semi-automatic modes like Aperture or Shutter Priority as “training wheels” before tackling full manual control․
Choosing the right mode depends on the shooting situation and desired outcome․ For portraits‚ Aperture Priority is ideal for controlling depth of field․ For action shots‚ Shutter Priority freezes motion․ Manual mode excels in consistent lighting conditions where precise control is paramount․
Aperture Priority Mode Explained
Aperture Priority mode (Av or A) empowers photographers to dictate the aperture – controlling depth of field and influencing the aesthetic of the image․ The camera then automatically selects the appropriate shutter speed to achieve proper exposure‚ based on the chosen ISO․ This mode is exceptionally useful for portraits‚ landscapes‚ and situations where depth of field is a primary creative consideration․
Using Aperture Priority‚ a wider aperture (lower f-number like f/2․8) creates a shallow depth of field‚ blurring the background and isolating the subject․ Conversely‚ a narrower aperture (higher f-number like f/16) yields a greater depth of field‚ keeping more of the scene in focus․ PDF resources often illustrate these effects visually․
While the camera manages shutter speed‚ monitoring it is crucial․ If the selected shutter speed is too slow‚ resulting in motion blur‚ consider increasing the ISO to allow for a faster shutter speed․ Understanding this interplay is key to mastering Aperture Priority and achieving desired results․
Shutter Priority Mode Explained
Shutter Priority mode (Tv or S) allows photographers to control the shutter speed‚ freezing motion or creating motion blur‚ while the camera automatically adjusts the aperture to maintain proper exposure‚ considering the set ISO․ This mode excels in sports photography‚ capturing fast-moving subjects‚ or intentionally blurring motion like waterfalls․
Selecting a fast shutter speed (e․g․‚ 1/1000 sec) freezes action‚ ideal for sports or wildlife․ A slower shutter speed (e․g․‚ 1/30 sec) introduces motion blur‚ useful for conveying a sense of movement or creating artistic effects․ PDF guides often demonstrate these effects with example images․
However‚ remember the camera adjusts aperture․ If the resulting aperture is too wide or narrow for desired depth of field‚ adjust the ISO․ Increasing ISO allows for a smaller aperture while maintaining the chosen shutter speed․ Mastering this balance is vital for effective use of Shutter Priority mode․
Manual Mode: Complete Control
Manual (M) mode grants photographers full creative authority over aperture‚ shutter speed‚ and ISO‚ demanding a thorough understanding of the exposure triangle․ Unlike semi-automatic modes‚ the camera offers no assistance; exposure is entirely dictated by your settings․ Utilizing an aperture‚ shutter speed‚ ISO chart – often available as a PDF – becomes invaluable for quick reference․
Achieving correct exposure in Manual mode relies heavily on the camera’s light meter․ Balancing these three elements requires practice‚ but unlocks unparalleled creative potential․ You can precisely control depth of field with aperture‚ motion with shutter speed‚ and sensitivity to light with ISO․
While challenging initially‚ Manual mode fosters a deeper connection with the photographic process․ PDF resources often include example scenarios and corresponding settings‚ aiding in the learning curve․ Mastering Manual mode is the ultimate step towards photographic mastery‚ offering complete artistic freedom․
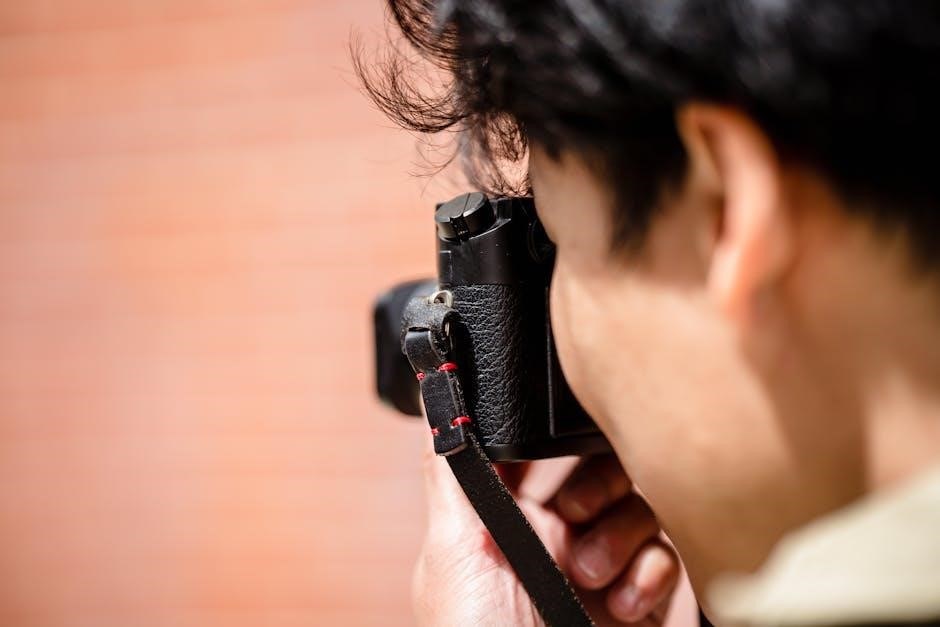
Reading a Light Meter
The camera’s light meter is your primary tool when shooting in Manual mode‚ indicating whether your chosen settings will result in an underexposed‚ overexposed‚ or correctly exposed image․ Typically displayed as a horizontal scale‚ ‘0’ represents proper exposure․ Values to the left of ‘0’ indicate underexposure‚ while those to the right suggest overexposure․
Understanding the meter’s reading is crucial․ A PDF exposure chart can serve as a quick reference‚ correlating aperture‚ shutter speed‚ and ISO values to meter readings․ Adjust your settings – aperture‚ shutter speed‚ or ISO – until the meter needle aligns with or is close to ‘0’․
However‚ remember the meter is often ‘fooled’ by scenes with predominantly light or dark tones․ Experienced photographers learn to intentionally deviate from the ‘0’ reading for creative effect․ Practice and referencing a comprehensive aperture/shutter/ISO chart will refine your ability to interpret and utilize the light meter effectively․
Creating an Aperture‚ Shutter Speed‚ ISO Chart (PDF Focus)
Developing a personalized aperture‚ shutter speed‚ and ISO chart‚ ideally in PDF format for easy access‚ is invaluable․ Begin by listing common shooting scenarios – landscapes‚ portraits‚ action shots‚ low light – across the top․ Down the side‚ enumerate typical ISO values (100‚ 200‚ 400‚ 800‚ etc․)․
Within each cell‚ populate suggested aperture and shutter speed combinations․ For example‚ a landscape at ISO 100 might suggest f/8 and 1/125 sec․ Action shots will necessitate faster shutter speeds‚ potentially increasing ISO․ Utilize existing PDF resources as templates‚ adapting them to your preferred style․
Remember to include notes on depth of field and motion blur․ A well-crafted chart isn’t rigid; it’s a starting point․ Regularly update it based on experience․ Having this readily available PDF streamlines workflow and reinforces understanding of the exposure triangle‚ improving photographic consistency․
Free PDF Resources for Exposure Charts
Fortunately‚ numerous websites offer downloadable PDF exposure charts‚ simplifying the learning process for aperture‚ shutter speed‚ and ISO․ These resources often present information in a concise‚ visually appealing format‚ ideal for quick reference during shoots or study․
Many photography blogs and educational sites provide basic exposure charts as free downloads․ Searching for “exposure triangle chart PDF” yields a wealth of options․ Look for charts that clearly illustrate the relationship between settings and their impact on image appearance․
Furthermore‚ camera manufacturers sometimes offer PDF guides covering exposure․ These can be found on their support websites․ Utilizing these free resources accelerates understanding and provides a solid foundation for mastering manual mode and achieving desired creative effects․ Remember to cross-reference multiple charts for a comprehensive view․
Practical Examples: Scenarios & Settings
Let’s explore real-world scenarios and corresponding camera settings‚ bridging theory with practice․ For a bright‚ sunny landscape‚ consider aperture f/8‚ shutter speed 1/250s‚ and ISO 100 – a solid starting point․ Referencing an aperture/shutter speed/ISO chart PDF can quickly confirm this exposure․
Conversely‚ for low-light indoor portraits‚ you might opt for a wide aperture like f/2․8‚ a slower shutter speed of 1/60s (stabilization helpful!)‚ and increased ISO‚ perhaps 800 or 1600․ A chart helps visualize the trade-offs․
Action photography demands faster shutter speeds – 1/500s or faster – potentially requiring higher ISO values and a narrower aperture to maintain sufficient depth of field․ These examples demonstrate how understanding the exposure triangle‚ aided by a handy PDF guide‚ empowers creative control in diverse situations․
Troubleshooting Exposure Issues
Overexposed images (too bright) often indicate too much light entering the camera․ Reduce aperture (higher f-number)‚ increase shutter speed‚ or lower ISO․ Conversely‚ underexposed images (too dark) require the opposite adjustments – wider aperture‚ slower shutter speed‚ or higher ISO․
Image noise‚ frequently appearing at high ISO settings‚ can be minimized by lowering ISO whenever possible‚ utilizing a wider aperture to allow more light‚ or employing a slower shutter speed (with stabilization)․ A comprehensive aperture/shutter speed/ISO chart PDF provides a quick reference for these adjustments․
Blurry photos can stem from slow shutter speeds causing motion blur or insufficient depth of field from a wide aperture․ Regularly consulting a chart helps diagnose and correct these common exposure problems‚ leading to sharper‚ better-exposed photographs․
 zen the art of archery pdf
  fruit of the spirit pdf
  norwegian sun deck plan pdf
  free disc personality test pdf
  body language pdf
  instructions for tiger rice cooker
  clip jam user manual
  canadian army cadet uniform guide
  canadian electrical code part 1 pdf free download